Stefanis Ioannis (jstefanis@teicrete.gr)
Jamilou Soulaiman (jamilu.sulaiman2602@gmail.com)
- Preface
- Description of the Problem
- Structure of the project
- The Scenario
- Detailed description of the steps for navigation and mapping
- Packages we used
- Conclusions
- References
This philosophy of this project aims to the better understanding of the various aspects and capabilities of the robot operating system (ROS) for implementing an rich scenario with the use of Turtlebot2 and the PhantomX Pincher platform
The problem consists of the implementation of a scenario exposing the ability of collaboration and autonomous operation of turtlebot robotic platform, along with the robotic hand in conjunction with robot operating system (ROS).
ROS Robot Operating System is robotics middleware initially developed from Willow Garage and Stanford Artificial Intelligence Laboratory. Its first release was at 2007 and its last stable release is Melodic Morenia in May 2018. Although ROS is not an operating system, it provides services designed for a heterogeneous computer cluster such as hardware abstraction, low-level device control, implementation of commonly used functionality, message-passing between processes, and package management. The version of ros we will use is Indigo, which is old but stable and feature rich.
Robotic Hand

The PhantomX Pincher Robot Arm is a 4 degree-of-freedom robotic arm and an easy addition to the TurtleBot ROS robot platform. Its task is pick-and-place operation. We have two robotic arms in our Scenario.
Turtlebot 2

TurtleBot is a low-cost, personal robot kit with open-source software. TurtleBot was created at Willow Garage by Melonee Wise and Tully Foote in November 2010.
Its task is the autonomous navigation and transfer of an object from the pick position to the “place position”
Kinect Sensor

Kinect is an consumer line motion sensing device developed by Microsoft for Xbox360 and Xbox One platforms and released on November 2010. Turtlebot is equipped with kinect v1 sensor device. Kinect v1 is a cheap but very effective sensor, able to track simultaneously six people and 24 skeletal joints per person. It will used for autonomous localization and tracking using amcl ros package.
Our project resides inside the folder solid_navigation with parent the folder src of the catkin_make environment.
Inside this folder we can see more folders which separate the different components of our project.
We have the folder config with various parameter configuration files for our scripts.
We have the folder maps which contains the map files for navigation.
We have the folder launch which contains the various initializers of our nodes along with parameter initialization in the form of .launch files.
We have the folder scripts which contains the python code of our project. The rest of the folders exist as a default skeleton for a project.
On the top of the hierarchy we have also some build files. The file package.xml describes the package we created for the project. Inside we stored important parameters required for the sucessful build of the package and also dependencies and requirements. The file CMakeLists.txt has a similar function for compiling succesfully our package by using the cmake build system.
The scenario is split in three parts. Autonomous navigation Visual Servoing Pick and Place function.

This is the part we had to implement. We have the robotic plateau where the scenario will take place. In this plateau we have two tables with an robotic hand attached on both. The turtlebot has to autonomously navigate and precisely locate itself in front of the first table (the pick position). Then the robotic hand will pick an object (a green cube) from the top of the table and place it on the turtlebot.
The turtlebot then leaves the pick position and moves to the place position. Then, it precisely places itself in front of the place table.
The last part of the scenario is the retrieval of the object from the top of the turtlebot by the second robotic hand and the placement of it on the table. In the whole scenario there is implementation of autonomous navigation, visual servoing and also collaboration between the robotic hand and the turtlebot.
Our groups’ responsibility is the autonomous navigation of the turtlebot in the plateau and accessing a point where the second group will perform the visual servoing part for precision positioning in front of the tables.
The autonomous navigation operation is split in two similar parts. In the first part the robot navigates into the plateau until reaching the pick table. In the second part, the robot leaves the pick table and approaches the place table for the last part of the collaborative scenario.
Our task of the scenario has also the responsibility to communicate with messages that the goal of approaching each of the tables is reached. Then the Visual Servoing group takes over. It has also to be able to listen to the message from the robotic hand that pick operation is finished for starting the second part of the navigation plan.
As an safety switch, an countdown time counter is implemented in the case that for any reason, there is not message from the robotic hand for ending its task. When time ends, the robot continues with the second part of the navigation task of the scenario.
For the implementation of our part of the scenario we used various packages directly available online. We also decided to use python, a really fast and effective programming language.
Our plan is split in two parts. Autonomous navigation and Mapping For this task we used the ros navigation stack packages with the addition of amcl and ar_tags packages as helpers for navigating and mapping.
Our first task was to create a map of the robotic plateau for the robot to be able to navigate. For this part we used the map server service and we manually surveyed the turtlebot inside the plateau in order to have an map with the surrounding environment. After finishing this task we stored the resulting map and checked if it was alright. The reason for mapping is that by using a map as a reference we can move to the second part, the navigation task.
Even if we give the initial pose of the robot and also the coordinates for the different tasks, due to sensor errors and drift, in a short time the robot will be offset in an different position in the map regardless how well the mapping task was performed.
For this reason we have to compensate the various noisy factors by using an process that will simultaneously correct the robot position on the map.
For this task we used the amcl package. Amcl is a probabilistic localization system for a robot moving in 2D. After using rviz visualisation application we were able to get the initial pose coordinates to the map and also the coordinates for our interest points.
Our points of interest are:
- The initial position of the robot.
- The center of the robotic plateau.
First the robot gets its initial pose from an configuration script. It also takes the coordinates for the second point that it will reach, the center. By using move_base package we order the robot to reach the center of the robotic plateau. With the help of amcl package the turtlebot moves to the center of the plateau aligned with the first table (the table of pick operation).
After center is reached, we raise a True flag to the topic /center_reached that visual servoing group is listening to, in order to take control of the robot and perform the visual servoing and precise positioning of the robot in front of the table.
At the same time we start an countdown counter in the case that we don’t receive a message that pick task has finished.
If the counter has reached zero or we have received a message that pick task has finished, the robot has to perform the second task of autonomous navigation.

For this task we have used ar_track_alvar package. This packages gives us the ability to use Augmented Reality Fiducials in a form of printed marks which are strategically positioned in the plateau to be able to position the robot correctly.
We have placed them in front of the tables and also in the position where the robot has to align itself for navigating and giving control for performing the fine positioning.
So, by using ar_track_alvar package we know anytime the distance of each tag in reference with the robot coordinate system. By using transform operations in our code we can translate the position of the robot in relation with the global frame. This help us to be able to position it autonomously to the points in the map where the robot is ready to continue with the visual servoing and pick-and-place procedure.
After using the coordinates given by the ar_track_alvar, the robot moves to a specified point near them and the navigation task has finished.
Initialization on the turtlebot and workstation At first we run some scripts to initialize the turtlebot platform and store the created map After sourcing and initializing environmental variables:
At the workstation we initialize ros:
roscore
We login to the turtlebot by using ssh.
In the turtlebot we run:
roslaunch turtlebot_bringup minimal.launch –screen
In the workstation we launch logitech teleoperation node:
roslaunch turtlebot_teleop logitech.launch --screen
Now we are able to manually navigate into the robotic plateau by using logitech game joystick.
The next step is to launch the map server service to be able to map the environment on a 2d map.
On the turtlebot in a new terminal we launch gmapping_demo launch file:
roslaunch turtlebot_navigation gmapping_demo.launch
According to the roswiki documentation “The gmapping package provides laser-based SLAM (Simultaneous Localization and Mapping), as a ROS node called slam_gmapping. Using slam_gmapping, you can create a 2-D occupancy grid map (like a building floorplan) from laser and pose data collected by a mobile robot.”
Instead of using a laser sensor, we use the kinect sensor in simulation mode.
Next command initializes map_server which will save the resulting map into the referenced folder.
rosrun map_server map_saver -f /home/turtlebot/ros/indigo/catkin_ws/src/solid_navigation/maps/map
We have to be careful and put the full path of the folder unless we want to get in trouble.
In the workstation:
roslaunch turtlebot_rviz_launchers view_navigation.launch
We launch the rviz visualisation application to be able to see what the robot "sees" at the same time.
This script launches the map server and stores two files into the folder maps. The files are map.yaml and map.pgm. The file map.yaml contains the metadata about our map:
image: map.pgm
resolution: 0.050000
origin: [-13.800000, -13.800000, 0.000000]
negate: 0
occupied_thresh: 0.65
free_thresh: 0.196
The first line references to the image of the map (map.pgm) and the rest of the map metadata are useful for the turtlebot to interpret it.
Now by using the logitech gamepad we have to navigate the whole robotic plateu to create an useful map for our robot.
When we are satisfied that we covered the full room, we press Control+C on the terminal to save the map and stop the map server.


We retrieve the coordinates of the initial position of the turtlebot and also the coordinates of the center. We store them at the file map_navigation_stage.launch . Now we have a set of coordinates useful for performing the first task of autonomous navigation and mapping.
In this step we position the turtlebot at the initial pose at the corridor outside the robotic plateau. First we restart everything. We give again the following orders to initialize it:
At the workstation we initialize ros:
roscore
We login to the turtlebot by using ssh.
In the turtlebot we run:
roslaunch turtlebot_bringup minimal.launch --screen
In the workstation we launch rviz visualization to be able to see what also the robot sees.
In the workstation:
roslaunch turtlebot_rviz_launchers view_navigation.launch
Inside the folder launch we have the various launch files which start other launch files and also the nodes of our package.
The main launch file is called initialize_scripts.launch and is responsible for initializing the environment, starting the nodes and passing the various arguments and parameters.
This file also calls the rest of the launch files that exist inside the folder and perform the various initialization subtasks.
In the turtlebot:
roslaunch solid_navigation initialize_scripts.launch
In the case that we will use amcl for navigation we have to use its launch file in the turtlebot with the command
roslaunch turtlebot_navigation amcl_demo.launch
In the case that we will use the kinect camera to detect the ar_tags we have to initialize another launch file:
in the turtlebot:
roslaunch freenect_launch freenect_launch
At this point we faced a problem. We couldn’t find a way to have kinect sensor to work simultaneously in particle filter navigation mode along with camera node.
So for the part of using amcl package we have to launch the respective launch file (amcl_demo.launch). For the part of ar_tag recognition we have to launch freenect.launch.
The solution we found for this conflict was to use roslaunch library and create a python script called launch_manager.py inside scripts folder.
This script manages the launching and killing of the different launch files.
For this script to operate we created a topic called ready_for_nav_second_task which when it’s true, the amcl launch file is killed programmaticaly by the script. After this, a true flag is enabled to the topic called freenect_nav_started.
The script initializes the freenect_launch file to start ar_tag detection.
So for the first part of navigation we launch the amcl_demo.launch file programmaticaly and we start the navigation by setting the initial pose of the robot on the map and also the first goal which is on the center. These point coordinates exist in the file map_navigation_stage.launch.
The python script responsible for the first part of the navigation is named goto_starting_pose.py The robot starts navigation by using the static map we created in the previous step and also amcl package for correcting the position by creating an point cloud of the possible positions of the robot on the map.
This is processed probabilistically by using monte-carlo methods and gives a good approximation of the present state of the robot.
The file goto_starting_pose.py is responsible for moving the turtlebot to the center of the plateau. When the center point of interest is reached, a true flag is raised at the topic /we_re_at_the_center. This topic gives the message to the visual servoing group to start the visual servoing process for precise positioning of the turtlebot in front of the “pick table”.
At the same time an countdown counter is initialized with duration 300 seconds.
The counter is implemented in the node alt_pick_message of the script alt_pick_message.py. This node subscribes to the message /we_re_at_the_center and starts a countdown counter of 300 seconds.
At the end of this timer the robot will raise a true flag in the topic /pick_finished_alternative and continue with the second task of navigation without waiting indefinitely for a true flag in the topic /pick_finished to be raised.
In the case that the topic /pick_finished has a true flag, it means that the visual servoing and pick operation finished correctly and the turtlebot has to continue for the second part of the navigation task. In this case the node kills itself immediately.
For the correct use of the local and the global frame of coordinates in the file goto_starting_pose.py, we use the function quaternion_from_euler() to convert the roll,yaw,pitch euler notation into a quaternion and feed it to the move_base function for giving the robot a goal to navigate in the global map frame.
At an abstract level, a transform tree defines offsets in terms of both translation and rotation between different coordinate frames.
At the end of the visual servoing and pick the robot is positioned with its back in front of the pick table. After the pick flag has raised, the robot will move back to the center of the plateau to start the second part of the navigation.
When the pick task has finished and the flag on the topic has been detected, the robot will return to the center position again.
This task is implemented with return_from_pick_point node.
This node is similar to go_to_starting_pose node and subscribes both to /pick_finished_alternative and /pick_finished topics.
When it receives a True flag from one of this topics it returns at the previous position on the center and publishes a topic called /ready_for_nav_second_task and sets its flag to True when it reaches its goal.
At this point we have finished with the first part of the navigation task.
In this point the turtlebot is at the center of the plateau. It is time for the turtlebot to disable amcl navigation and start navigation by using ar tags which are provided by the package ar_track_alvar. The process of ar_tags creation will be described at the end of this section.
What we need to know for now is that the turtlebot by using the kinect camera, can detect these printed tags around the robotic plateau and translate their shape at an unique “id”. This tag id will be used after to define the position of the robot in relation with these tags.
This is possible because the ar_track_alvar package gives the ability to turtlebot to calculate its pose in relation with the position of each of the tags.
When the topic /ready_for_nav_second_task is published, amcl node is killed and freenect node is enabled.
At this point the node rotate_for_detection.py is activated. When it receives the True flag in the topic /ready_for_nav_second_task where is subscribed, it rotates turtlebot for a full circle at the center point.
When the rotation has been finished the rotate_for_detection.py script publishes a true flag at the topic /rotation_flag.
This flag is also used for tag_pose_localisation node which starts the tag detection during the rotation of the turtlebot.
At the end of this rotation all the available tags must have been detected.
In this step we have the tag_pose_localisation node active for detecting the existing tags at the robotic plateau.
This node subscribes at two topics. The first topic is /rotation_flag which starts the ar_tag detection when True.
The second topic is /amcl_pose which gets the last pose of the amcl navigation and stores it as the current position of the turtlebot.
The function get_turtlePose() is a callback for the /amcl_pose subscription topic. This function returns the current orientation (z,w,angle) and the position (x,y,z) of the turtlebot.
At the start of the initialization we launched a launch file called ar_tracker.launch which initializes the alvar tracker node.
This launch file also sets the parameters of the tag size and error tolerance for detection.
At this point we have the /ar_pose_markertopic initialized from ar_tracker.launch file. This topic returns a message of type AlvarMarkers.
This topic has a callback function when a tag is detected with the name get_tag_detection(). When a tag is detected, this function is able to read its id and also to calculate the pose of the tag in relation with the base frame of the turtlebot.
This function is configured to detect three tags with the id [0,1,2]. In the case that any other tags exist on the scene, they are simply ignored. These three tags are positioned at these points:
Tag 0 at the point where the robot has to approach and turn to face the place table.
Tag 1 in front of the pick table.
Tag 2 in the opposite side of the pick table
The function starts a tag counter and stops the detection when all the referenced ids’ are detected. For each tag detected it raises a flag that it is detected and takes the average of three measurements for calculating the position of it.
After this, by calling the function transform_coords() , transforms the point coordinates of each tag from the local framework reference of the turtlebot base, to the global reference framework of the map.
For this operation we use an transform matrix of the form
    cos(theta) 	-sin(theta)	    0	PosX
    sin(theta)		0   cos(theta)	Posy
            0		0	1		    Posz
            0		0	0		    1
At the end, the get_tag_detection() function returns both the tag_ids’ for the tags detected and also their coordinates in the global map reference.
When each tag is detected, a True flag is raised at the Published topics /t0_flag,/t1_flag,/t2_flag
Our pose coordinates from the function get_tag_detection() are published in the topics /target_pose0,/target_pose1,/target_pose2.
When the three tags are detected, we validate that the turtlebot is aligned with the two of the tags which are positioned in front and the opposite side of the pick table and it also has the position coordinates of the third tag which will help us to set the next navigation goal.
The next navigation goal will be in front of the third tag. This is the last part of the navigation task and after we have to give control to the visual servoing group by setting True the flag of the topic /navigation_finished.
For the last navigation goal we created the node last_navigation_goal at the file last_navigation_goal.py.
The last_navigation_goal node subscribes to the /target_pose1 topic of type PoseStamped.
We send this goal to the function goto and the turtlebot will approach the tag as far as the local costmap configuration will allow. By default is 20 centimeters.
When we have reached the goal we publish a true flag to two topics. The first topic is /we_re_at_the_second_goal_nav and the second one is /navigation_finished.
The second topic that this node publishes is: /we_re_at_the_second_goal_nav. The node rotate_for_detection is subscribed to this topic and when it gets an True value, the function rotate_quarter() is triggered which turns the turtlebot 90 degrees clockwise.
At this point the turtlebot must be facing the place table and the navigation task is finished.
After 20 seconds of the raising of this flag, the last_navigation_goal node publishes the last topic /navigation_finished
With this topic we can give control to the visual servoing group for precise positioning of the turtlebot in front of the place table.
amcl: amcl is a probabilistic localization system for a robot moving in 2D. It implements the adaptive (or KLD-sampling) Monte Carlo localization approach (as described by Dieter Fox), which uses a particle filter to track the pose of a robot against a known map. which uses a particle filter to track the pose of a robot against a known map”,
tf: for transformations between different coordinate reference frames,but also for transforms from euler to quartenion angles
ar_track_alvar: This package is used for the creation of the alvar tags, their detection and pose estimation. It is a wrapper of Alvar, an open source AR tag tracking library. Its main functionalities are:
- Generating AR tags of varying size, resolution, and data/ID encoding
- Identifying and tracking the pose of individual AR tags, optionally integrating kinect depth data (when a kinect is available) for better pose estimates.
- Identifying and tracking the pose of
bundlesconsisting of multiple tags. This allows for more stable pose estimates, robustness to occlusions, and tracking of multi-sided objects.
For creating an ar_tag with id=0 I give the following command in a terminal, after I have installed ar_track_alvar package:
rosrun ar_track_alvar createMarker 0
This will save the respective tag in the current directory. We repeat this process for the whole set of tags we want to create.
We lost really invaluable time for trivial things because the documentation is dispersed in different points in books and online material and we couldn’t find how create the lines for joining the various documentation dots. This was the biggest obstacle for our project implementation.
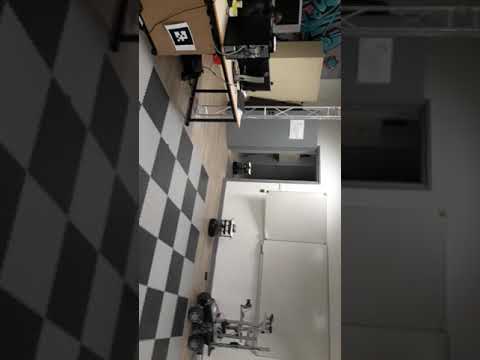
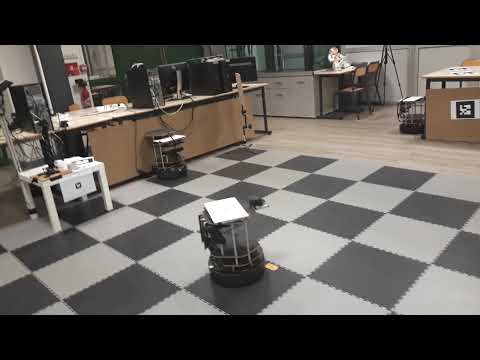
Video 1: The first part of navigation testing
Video 2: The second part of navigation testing
- https://answers.ros.org/
- ROS Robotics Projects (2017-03, I, Python)
- ROS Robotics Projects (2017-03, I, Python)
- ROSbyExampleVol2 (2014, HI, Python)
- A gentle Introduction to ROS (2013-10, G, C++)
- https://edu.gaitech.hk/turtlebot/turtlebot-tutorials.html
- http://learn.turtlebot.com/
- Robot Operating System (ROS) The complete reference Vol 1. Springer
- A lot of github projects with interesting bits and bytes