
The open-source Quizlet alternative.
Get up and running by following these steps.
- Node.js 18.x
- MySQL
- Bun
- Docker and docker-compose (recommended)
-
Clone the repo
git clone https://github.com/quenti-io/quenti
-
Go to the project folder
cd quenti -
Install dependencies with bun
bun i
-
Set up the
.envfile-
Copy
.env.exampleto.env -
Use
openssl rand -base64 32to generate a key forNEXTAUTH_SECRETand set it as the value in.env -
Use
openssl rand -base64 24to generate a key forQUENTI_ENCRYPTION_KEYand set it as the value in.env -
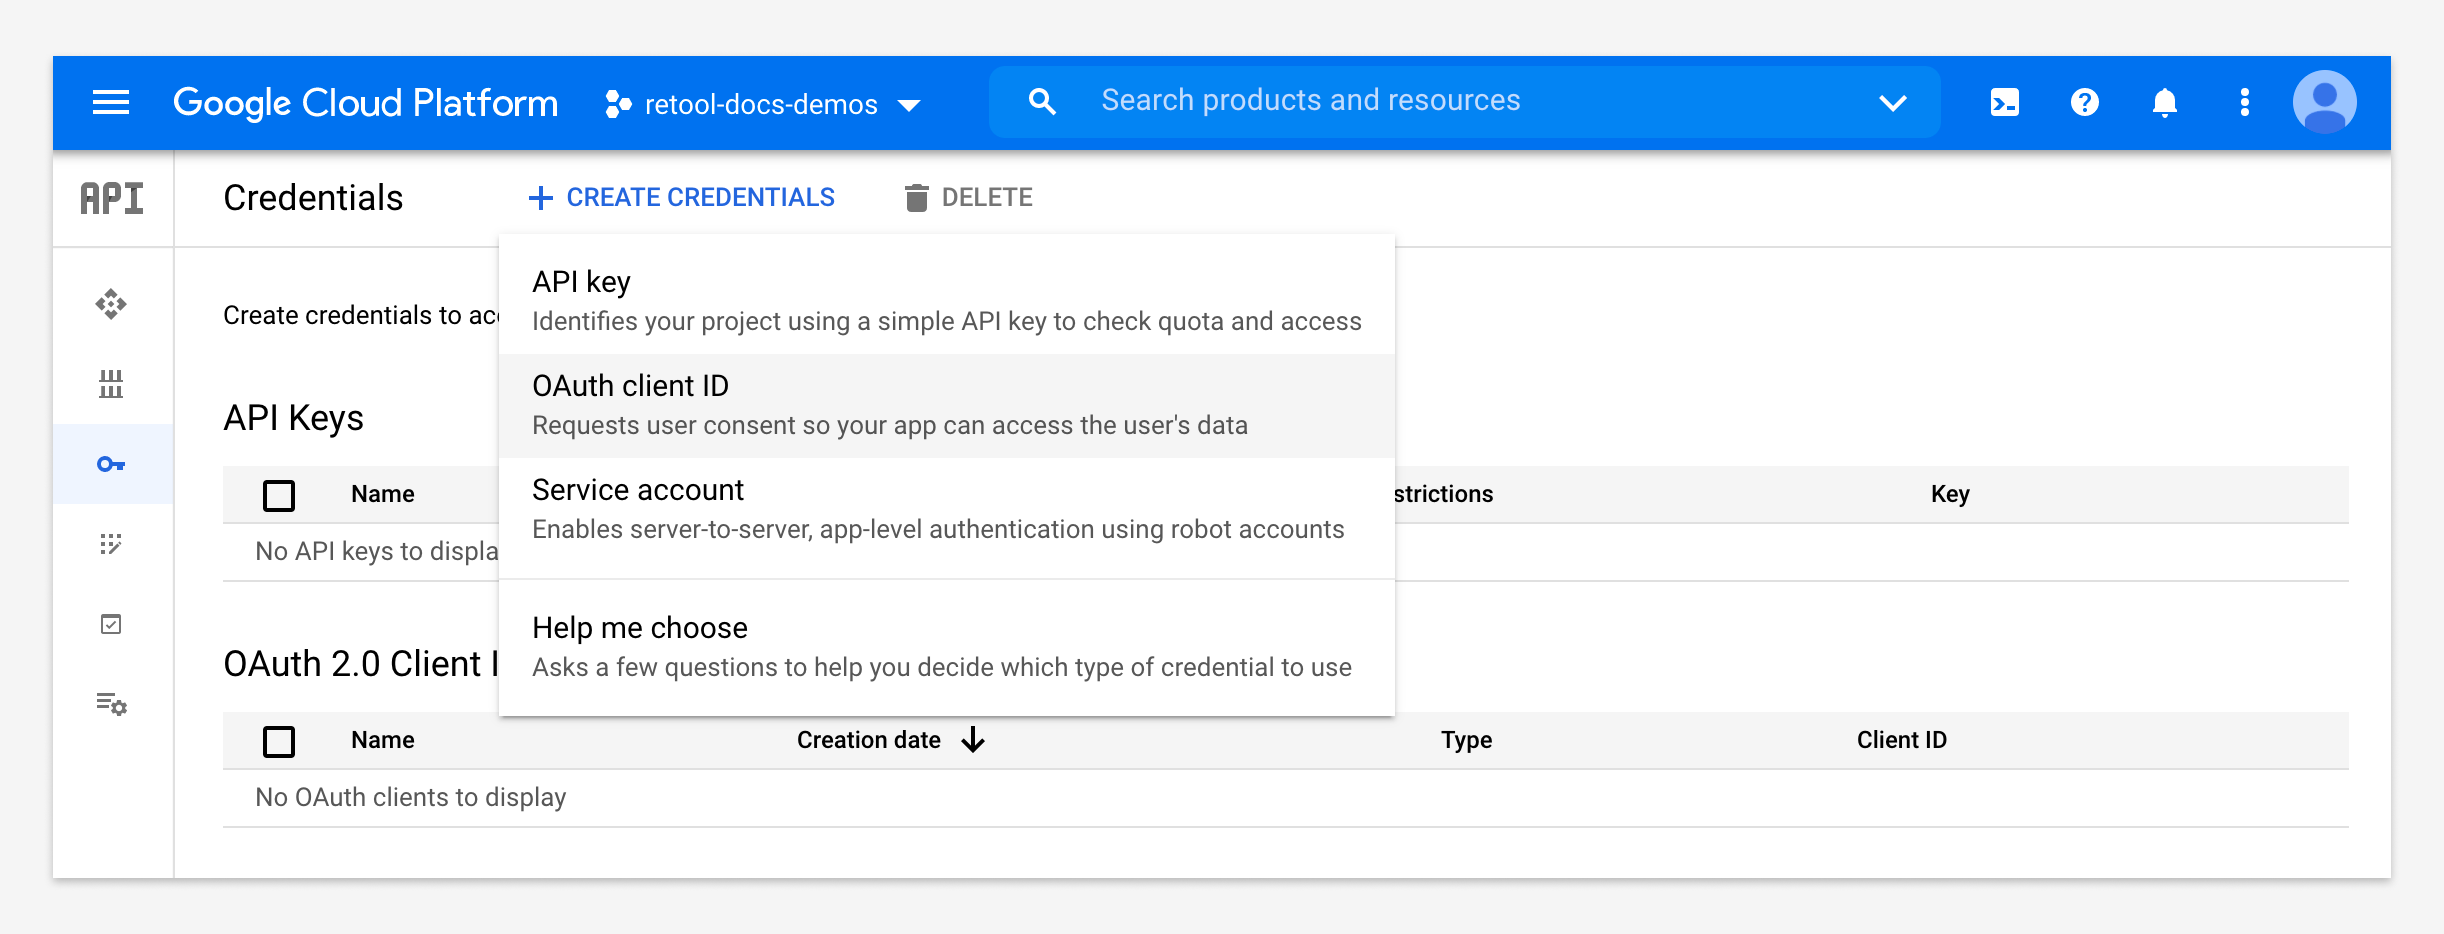
You'll need to create a Google OAuth client ID from the Google API Console. There are plenty of guides for this, like this one from LogRocket embedded:
Navigate to Credentials and click on Create credentials, and then OAuth client ID. You will be asked to fill in the following:
Choose an Application Type: Select Web Application
Name: This is the name of your application
Authorized JavaScript origins: This is the full URL to the homepage of our app. Since we are still in development mode, we are going to fill in the full URL our development server is running on. In this case, it is
http://localhost:3000Authorized redirect URIs: Users will be redirected to this path after they have authenticated with Google:
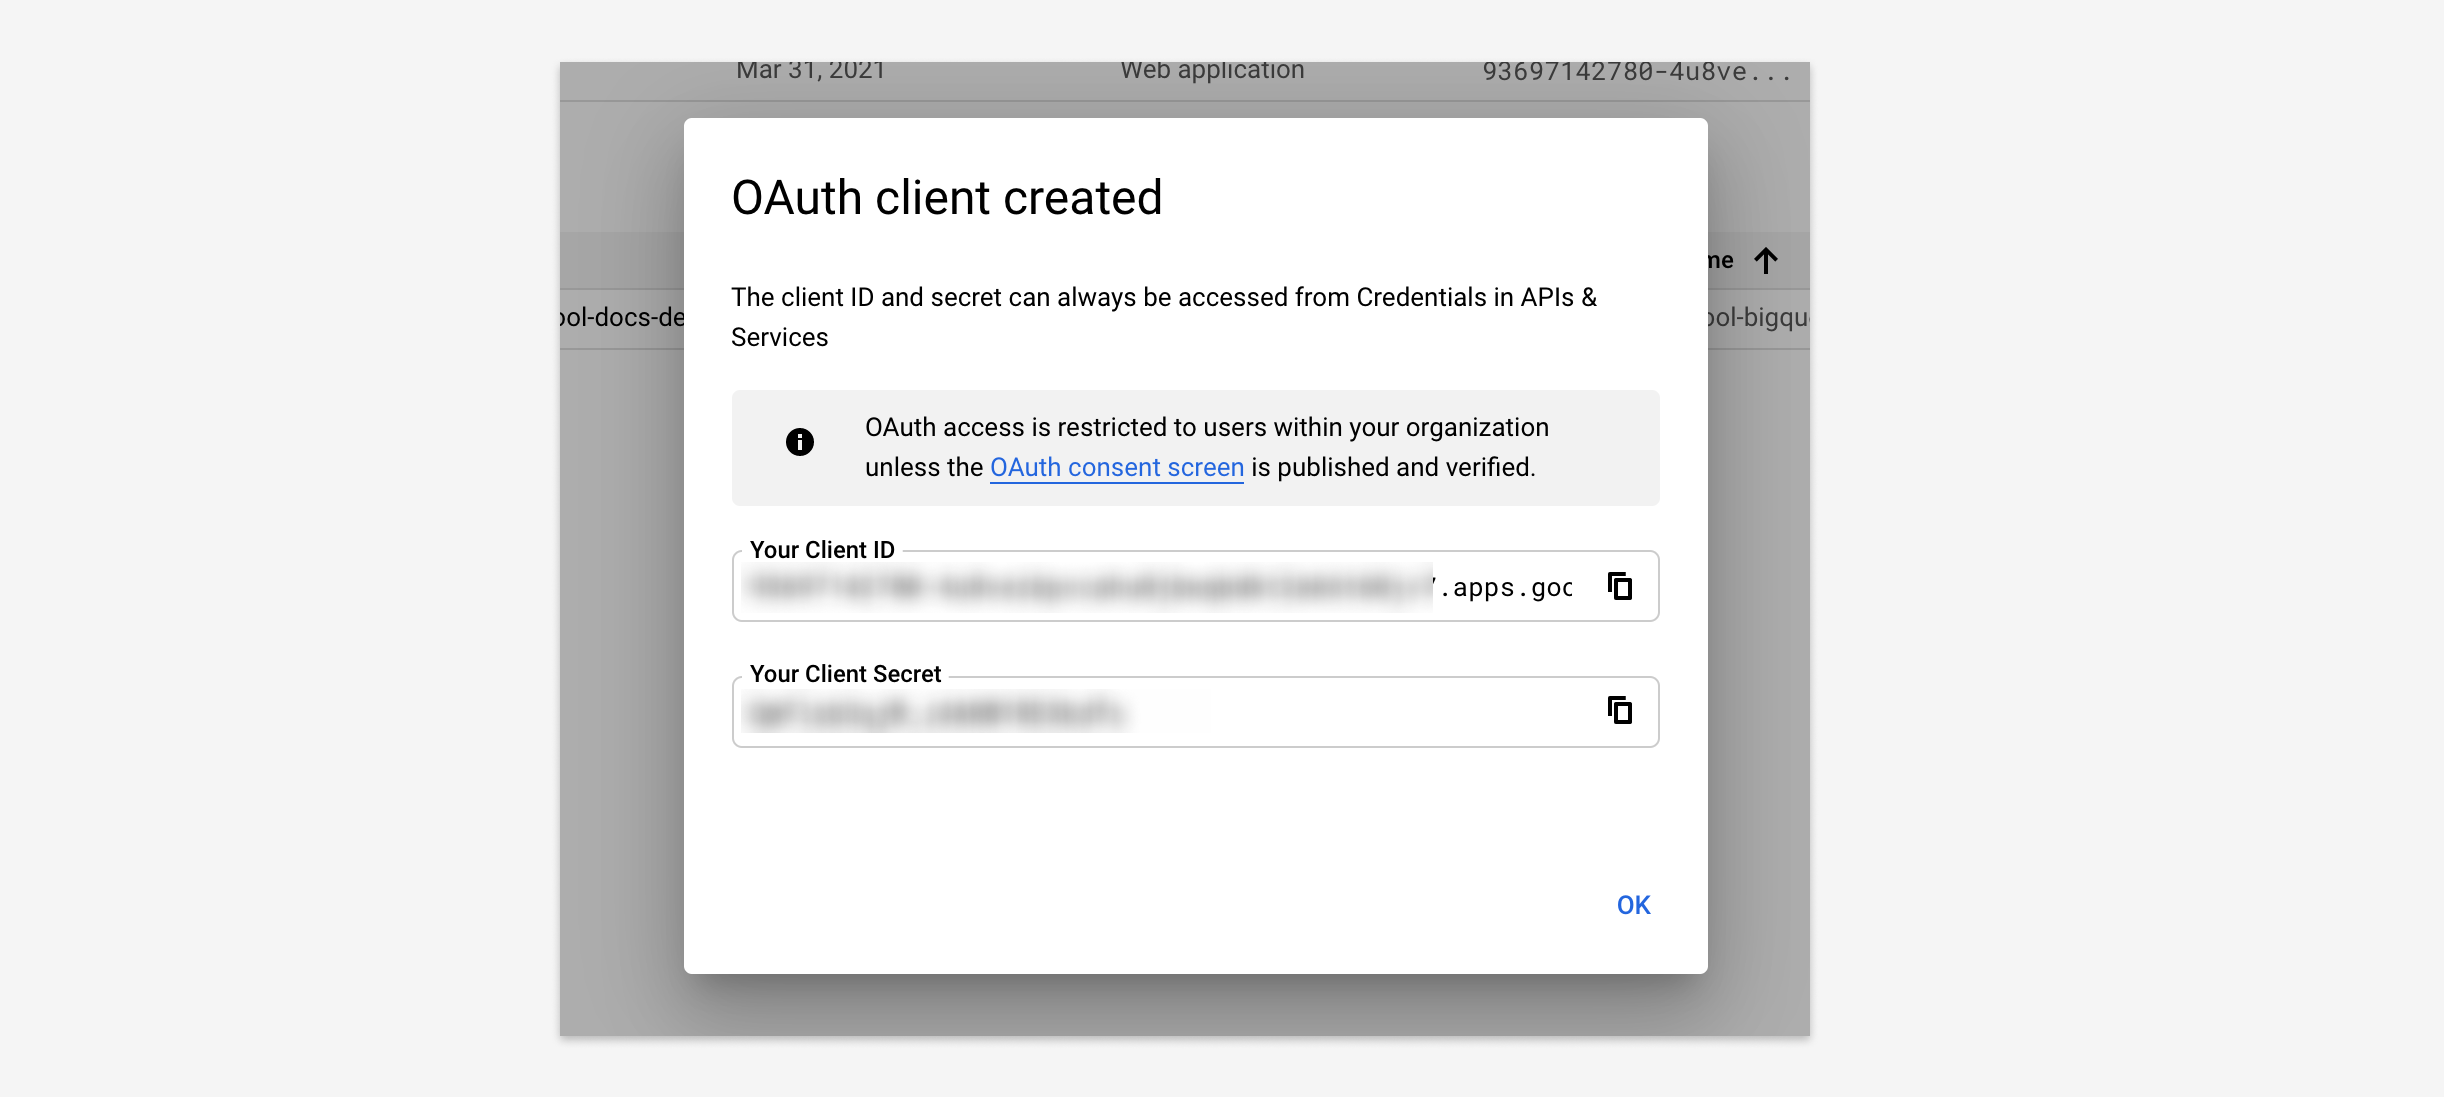
http://localhost:3000/api/auth/callback/googleCopy your client ID and secret created and fill in the
GOOGLE_CLIENT_IDandGOOGLE_CLIENT_SECRETvalues in.env
-
-
Start up a local MySQL database with
docker-compose -f docker-compose.mysql.yml up
-
Push schema changes and generate the Prisma client
bun prisma db:push
Start a development server with
bun devor create and start a production build with
bun run build
bun start
Navigate to http://localhost:3000 and Quenti should be up and running!