


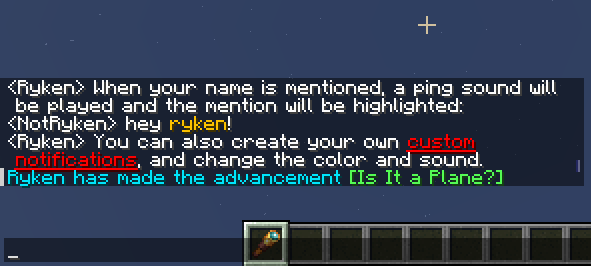
- Custom triggers - never worry about missing a message again!
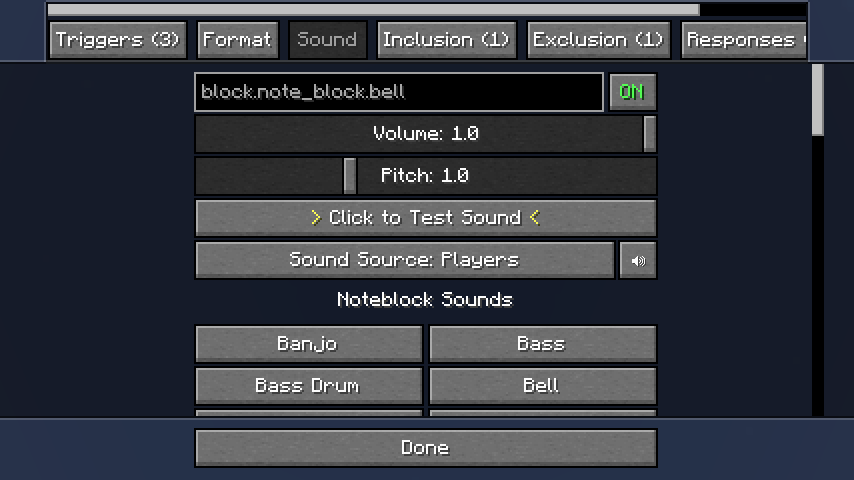
- Choose notification sounds from the full range of built-in and resourcepack sound effects.
- Adjust sound volume and pitch per-notification.
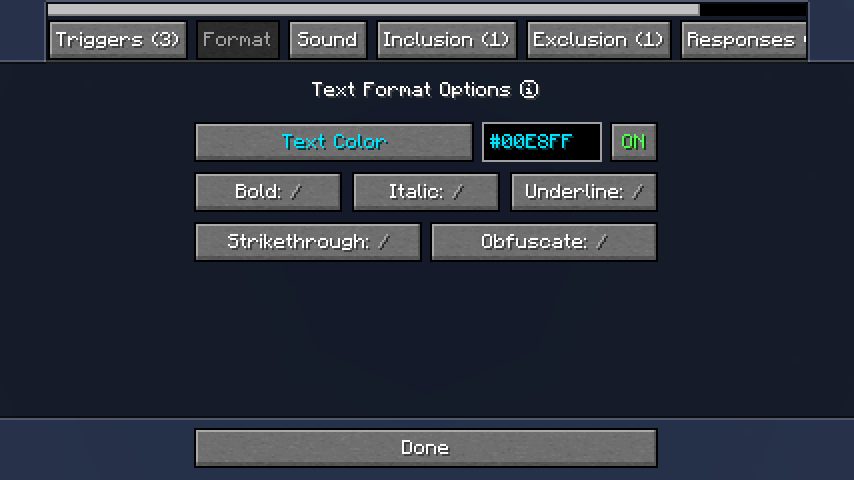
- Customize message highlighting with a color picker and format controls.
- Use regex patterns, inclusion and exclusion triggers for fine-grained control.
- Add automatic response messages or trigger CommandKeys macros.
- ChatNotify has a list of
Notifications, each of which has one or moreTriggers. - When a new message arrives in chat, ChatNotify starts checking the triggers of each notification.
- If a trigger matches the chat message, the corresponding notification will be activated. By default;
- The message will be edited to highlight the trigger that activated the notification.
- A sound will be played.
- You can create and customize your own notifications via the options screen, which can be opened via ModMenu on Fabric, or the mod list on NeoForge.
When you open the options screen, you'll see a list of notifications. You can set the notification trigger, color and sound here.
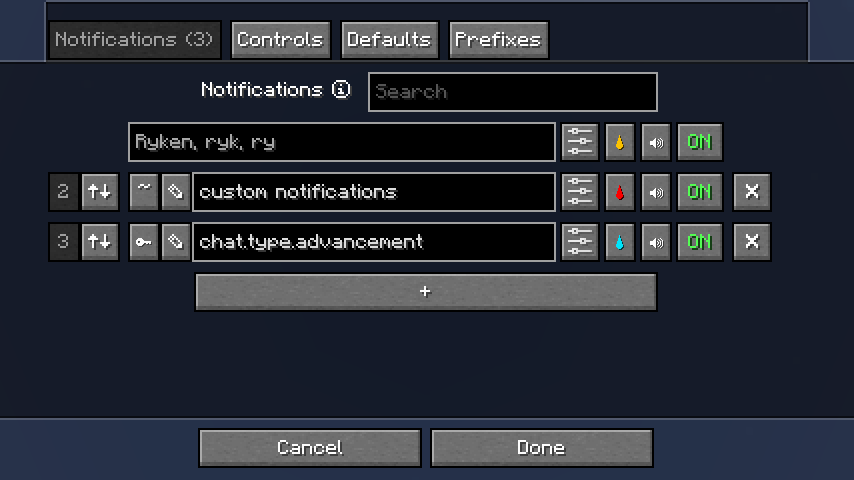
To change the trigger type, click the ~ button to the left of the text field.
- Normal
- This is what you probably want to use at first. Normal triggers aren't case-sensitive (so a trigger
hellowill match messages containingHELLO), and they don't match partial words (so a triggerrockwill matchrock!but notrocketorrock932).
- This is what you probably want to use at first. Normal triggers aren't case-sensitive (so a trigger
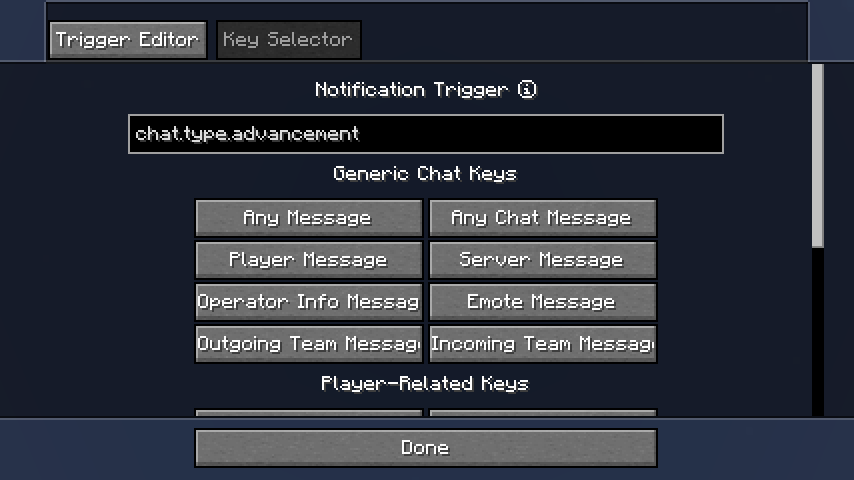
- Key
- In vanilla, each type of chat message has a different translation key (such as
chat.type.textorchat.type.advancement.task). You can use a key-type trigger to match all messages of that type. - Note: Many servers remove keys from messages, which will prevent this type of key from working. To check if a message has a key, use the trigger editor (see below).
- In vanilla, each type of chat message has a different translation key (such as
- Regex
- If you want more precise control, you can switch to this type and enter a regex pattern in the text field.
- Consider using the trigger editor (see below) and/or a tool such as regex101 to help create regex patterns.
Click the ✎ button to the right of the text field to open the trigger editor.
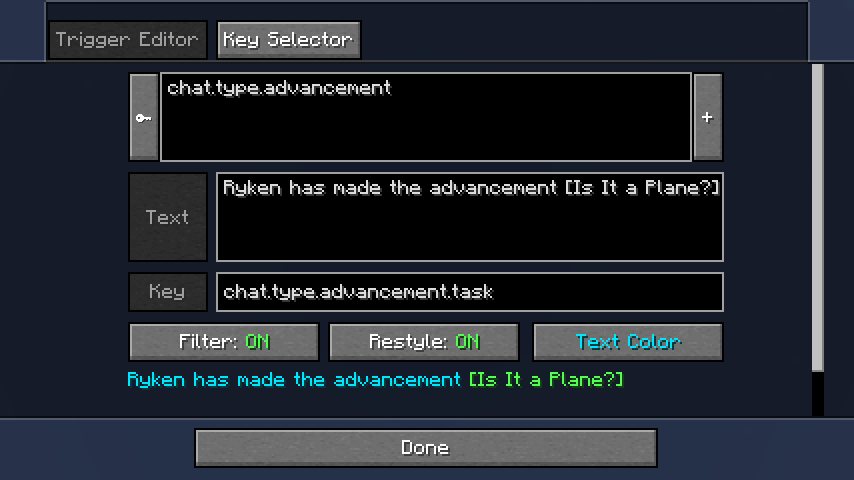
In the trigger editor, recent chat messages will be displayed in a list (most recent first). Use the Filter and
Restyle buttons to preview the effect of your trigger.
Click on a message to view the text and translation key (if any) so you can copy them.
Additionally, some common keys are available for selection in the Key Selector.
If you want to add more triggers, go back to Notifications and click on the options button to the left of the
color button. You'll now see a list of triggers, which you can edit as desired.
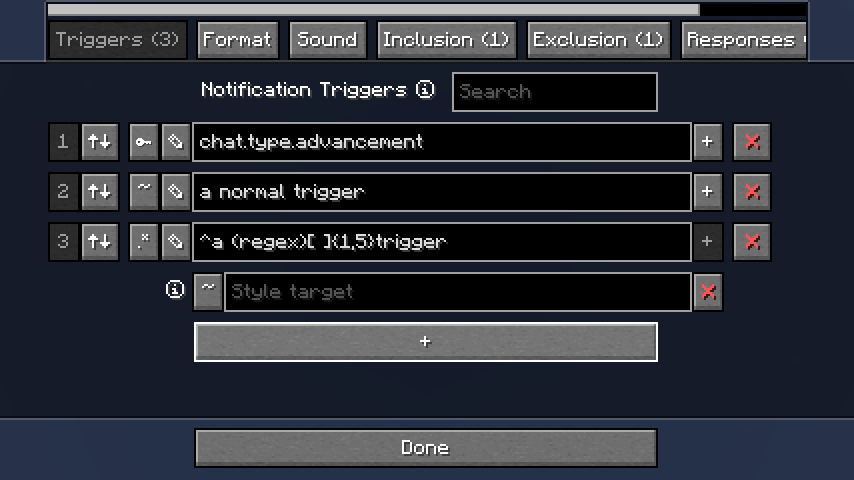
Sometimes for key-type and regex-type triggers you may want to highlight a different part of the message to what the trigger matches.
Adding a style target allows you to specify what part of the message should be highlighted. If the style target doesn't match the message, the trigger will be used as normal.
All built-in and resourcepack sounds can be used (click on the text field). Additionally, some sounds are available for quick selection.
The sound source controls which of Minecraft's volume control sliders will affect the notification sound, in addition to the volume control slider provided here.
Inclusion triggers do nothing by themselves, but if a trigger from the Triggers list matches a message, ChatNotify
will check all the triggers in this list and only activate the notification if they all match.

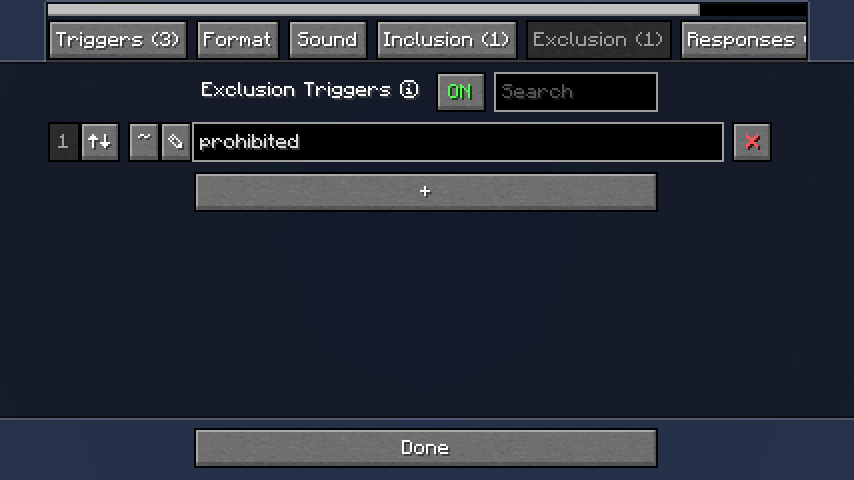
Exclusion triggers are the reverse of Inclusion triggers; before activating a notification, ChatNotify will check all
the triggers in this list and only proceed with activation if none of them match the message.
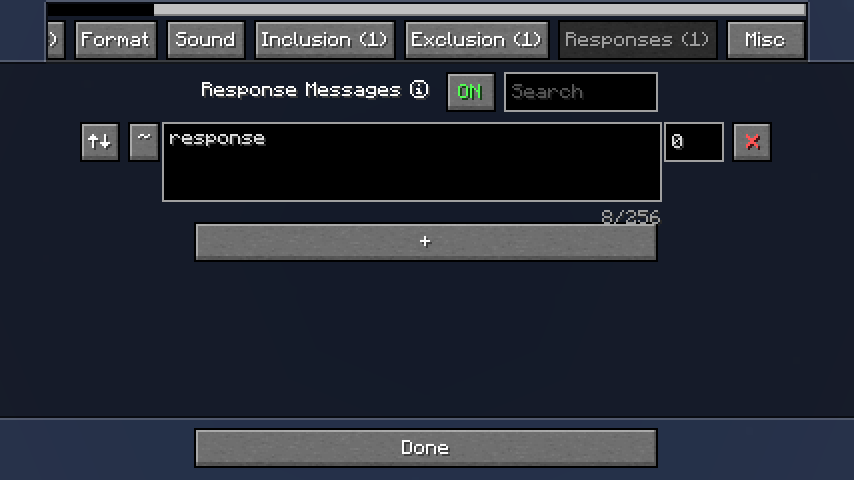
Response messages will be sent in chat when the notification is activated.
Use with caution, as you can easily make a notification send a response which triggers the notification again in a loop, which will spam chat and then crash the game.
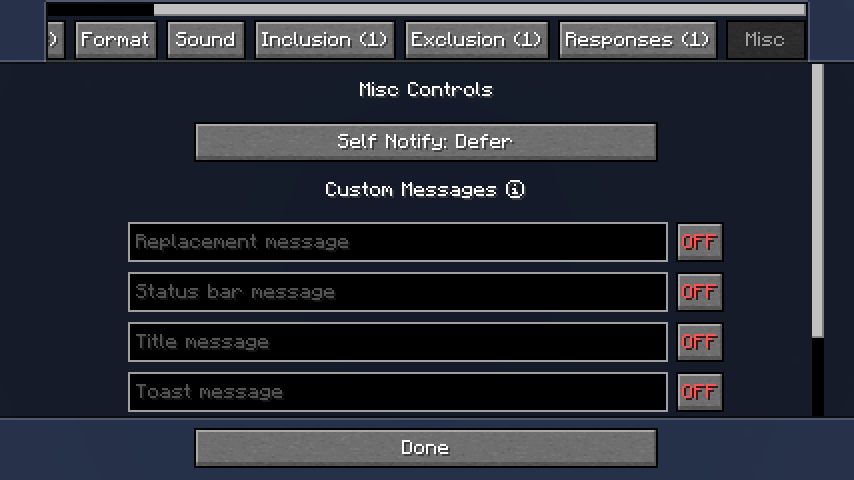
These are special ways of showing notifications, as an alternative to the normal 'play a sound and highlight the message'.
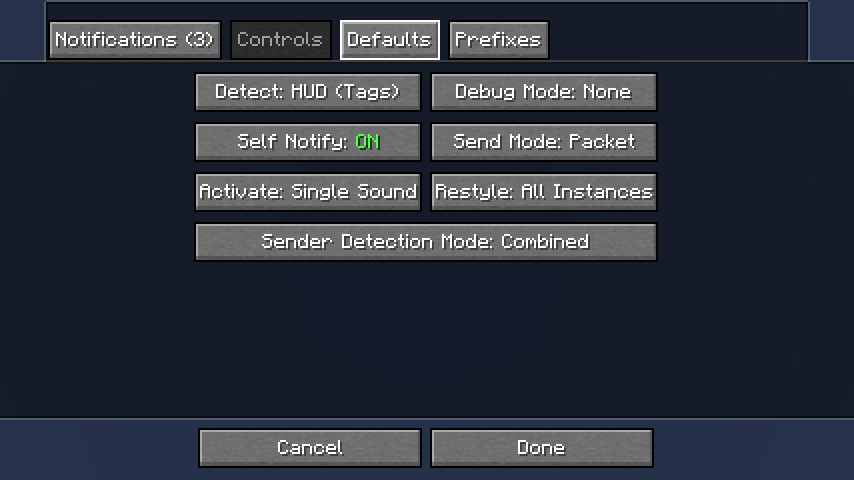
These options apply to all notifications, and control various aspects of ChatNotify's behavior. You should not
generally need to change them (you can if you want, of course), but the Detect and Send Mode options can be useful
in certain cases of conflict with other mods.
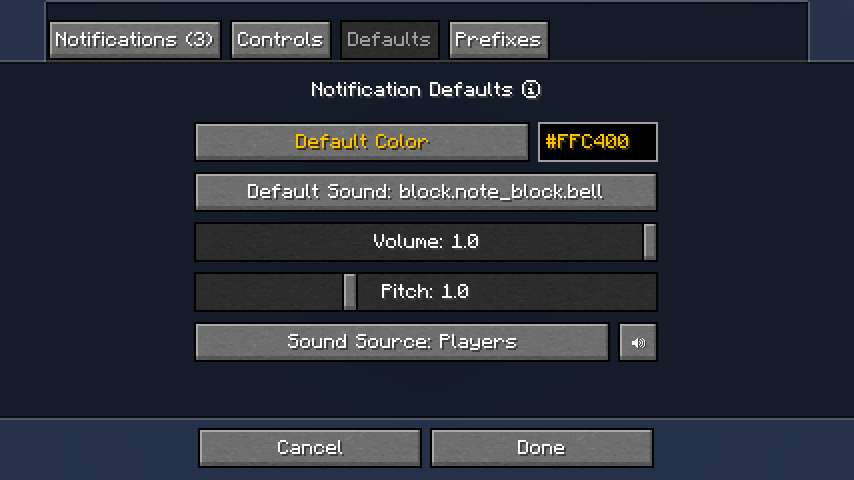
If you want new notifications to have a particular color or sound by default, you can set that here.
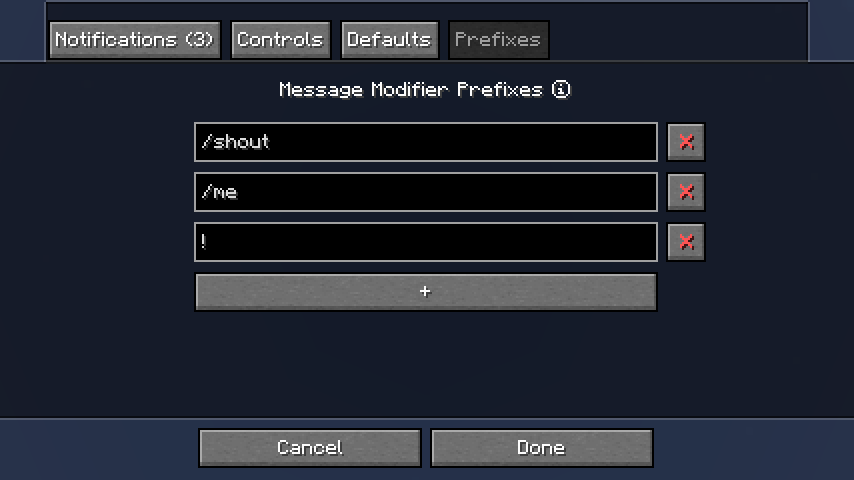
When ChatNotify is not using Chat Heads to detect the message sender, it will store your sent messages and compare them to incoming messages to determine which messages were sent by you. If you're on a server that modifies your messages, that system may not work properly, so prefixes can help.
If you're still being notified on every message that you send (because it contains your name) try installing
Chat Heads and setting Sender Detection Mode to Combined in the Controls
tab.
Special Widgets
ChatNotify uses a range of custom GUI widgets which behave differently to normal Minecraft.
- Color (
🌢) and sound (🔊) status buttons on the options screen support right-click to toggle status. - Text fields have been modified to support double-clicking, triple-clicking or clicking and dragging to select text.
- Text fields have also been modified to support
CTRL+Zto undo andCTRL+Yto redo edits. Note that edit history will be erased whenever the GUI is refreshed, which often happens when you click on a different widget. - Fullscreen overlay widgets such as the color picker and drop-down text field support clicking outside to cancel and close.
Chat Height Slider
- ChatNotify modifies the chat height slider (in Minecraft's
Chat Settings) to increase the maximum value to500px. - Your existing setting will stay the same unless you decide to change it.
Fabric: Fabric API, ModMenu
NeoForge: None
If you encounter issues, please report on Discord or GitHub.


