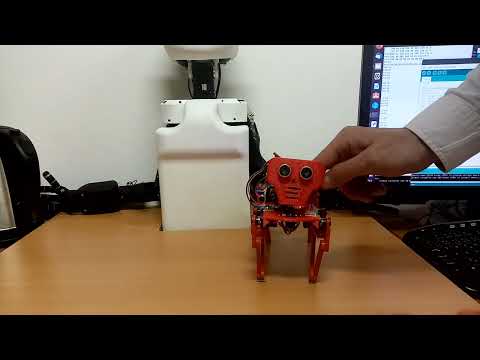
Cat-like arduino robot with 4 legs

list of parts:
mechanical:
- 4 legs - each made of 4 different pieces
- main body
- head
- screws for fixing arduino, power supply, and battery holders
electronic:
- 2x plastic holder for 16500 LiIon batteries
- 2x 16500 LiIon batteries
- 8x mg90s servo + 1x sg90 or mg90 for head (or 1x continuous servo for new version with rotating front legs)
- arduino nano strong
- lm2596 tuned to 5V (or 2x 5V4A step-down regulator)
- HC-SR04 ultrasonic sensor
- passive buzzer
- KCD-11 power switch
- cables
- resistor divider (i.e. 5.5K + 56K) to measure bat. voltage
optional:
- HC-05 compatible BT module
- extra 5V4A power supply to avoid spurious resets
- DfPlayer Mini, 2W 8Ohm speaker and microSD card
- analog microphone
- mpu6050 gyro/accelerometer
- capacitance touch sensor
Pin connections:
D0   reserved for programming/serial comm on USB
D1   reserved for programming/serial comm on USB
D2   BT Tx (i.e. our Rx, signal from BT to Arduino)
D3   Right back 2 (RB2)
D4   BT Rx (i.e. our Tx, signal from Arduino to BT)
D5   Right back 1 (RB1)
D6   Right front 2 (RF2)
D7   Right front 1 (RF1)
D8   Left front 2 (LF2)
D9   Left front 1 (LF1)
D10  Left back 1 (LB1)
D11  Left back 2 (LB2)
D12  Head
D13  Buzzer
A0   US Trig
A1   US Echo
A2   DfPlayer Mini Rx
A3   voltage divider on batteries
A4   SDA of MPU6050
A5   SCL of MPU6050
A6   Touch sensor
A7   Microphone
Building instructions: https://kempelen.dai.fmph.uniba.sk/files/kocur-v-cizmach-manual/
Choreographies are sequences of motor angles 0-179 8-tuples in this order: (delay is in ms and is applied 100-times per each move, typical values 1-10, e.g. 1 => the movement is spread over 100 steps, each lasting 1ms, in total about 100 ms. To change that parameter, edit play_step() function)
LF1 LB1 RF1 RB1 LF2 LB2 RF2 RB2 delay
In edit mode, use the following keys to move all degrees of freedom:
(-> means forward, <- means backward, servo 1 is front, servo 2 back)
1  LF1 -> -      2  LB1 -> -      3  RF1 -> +      4  RB1 -> +
q  LF1 <- +      w  LB1 <- +      e  RF1 <- -      r  RB1 <- -
a  LF2 <- +      s  LB2 -> -      d  RF2 <- -      f  RB2 -> +
z  LF2 -> -      x  LB2 <- +      c  RF2 -> +      v  RB2 <- -
https://www.youtube.com/watch?v=T9AiIFP-OWI
Software:
Arduino program allows to work with "choreographies": create, edit, test and debug, import, export, store into EEPROM, setup autoplay, and control the attached gadgets over the cable or Bluetooth module. Each of the three modes has interactive control and 'h' shows help - list of available commands:
MoKraRoSA. Press H for help
Control mode. Hit E for edit mode.
 1: forward
 2: backward
 3: right
 4: left
 5: down
 6: sit
 7: look around
Play the sequence: /
Repetitive play: \
Play eeprom seq: t g b
Initial position: *
Position 90: 9
Ultrasonic ON/OFF: u
Battery level (*100 V): B
Play melody: . , ; ' [ ]
Stop melody: ESC/:
Play/change music: m j n
Music volume on/off: M
Change music volume: < >
Print help: h
---------------------
Edit mode. Hit C for control mode.
Servo control:
1 ... q
2 ... w
e ... 3
r ... 4
z ... a
s ... x
d ... c
v ... f
Step size control:
- ... +
Store next point: ENTER/W
Print the sequence: SPACE/N
Load (paste in) the sequence: L
Save to EEPROM: E
Load from EEPROM: O
Toggle autostart: A
Erase sequence: R
Undo to last saved position: U
Enter debug mode: TAB/T
(to insert a break, repeat the same position again with delay)
Play the sequence: /
Repetitive play: \
Play eeprom seq: t g b
Initial position: *
Position 90: 9
Ultrasonic ON/OFF: u
Battery level (*100 V): B
Play melody: . , ; ' [ ]
Stop melody: ESC/:
Play/change music: m j n
Music volume on/off: M
Change music volume: < >
Print help: h
---------------------
Debug mode:
 TAB/T   - leave debug mode
 SPACE/N - move to next step
 ENTER/W - replace with current
 ESC/:   - restore current step
 D       - delete current step
 ESC/:   - insert step before current
Servo control:
1 ... q
2 ... w
e ... 3
r ... 4
z ... a
s ... x
d ... c
v ... f
Step size control:
- ... +
Print help: h
Warning:
The LiIon batteries are sensitive to a complete discharge, therefore the battery voltage is permanently measured using a voltage-divider against the built-in 1.1V power regulator, and when they reach a critical level, all functionality stops and an alarm is played using the passive buzzer. It is recommended to recharge batteries after the use, and store them for longer term charged to about a half of their capacity.
Links:
- Original project that inspired us: Baby “MIT Cheetah” opensource and 3D-printable robot by Marco (https://www.personalrobots.biz/baby-mit-cheetah-opensource-and-3d-printable-robot/)
- Our modifications in TinkerCAD (they may change): body and head (https://www.tinkercad.com/things/c9znID17vLj-cheetah-telo), legs (https://www.tinkercad.com/things/6ybUZ9S300i-cheetah-noha)
- Student project summer 2021: https://dai.fmph.uniba.sk/courses/dtv/index.php/Cheetah
- Student project winter 2021: https://wiki.robotika.sk/robowiki/index.php?title=Kocur_v_Cizmach_-_Alja%C5%BE_Andol%C5%A1ek_and_Ursek_Slivsek
contact: Pavel, pavel.petrovic at uniba.sk