3. Bootloader & flashing
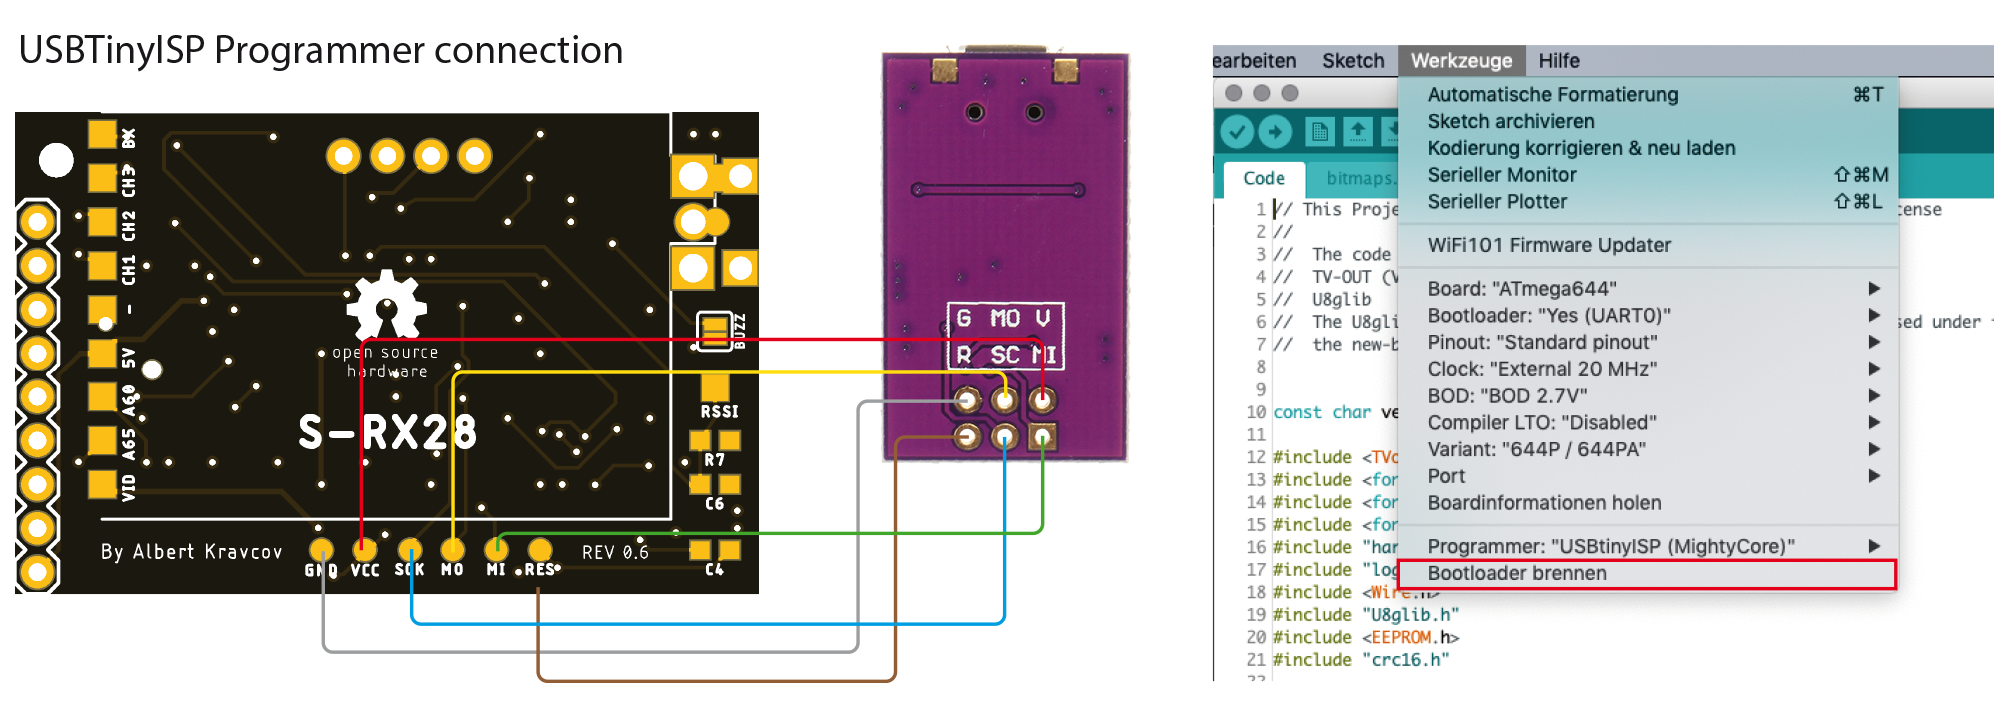
- Wire the USBtinyISP programmer like shown in the picture to the PCB.
- Install Arduino IDE
- Install the Arduino Libraries from the "Libs" folder.
- Install the MightyCore hardware package from here: https://github.com/MCUdude/MightyCore (just follow the instructions)
- Download the firmware and open the Code.INO file from the "Code" folder in Arduino
- Select the hardware and programmer settings in Arduino IDE as shown in the image below and click on "burn bootloader" - the process takes about 5 seconds.
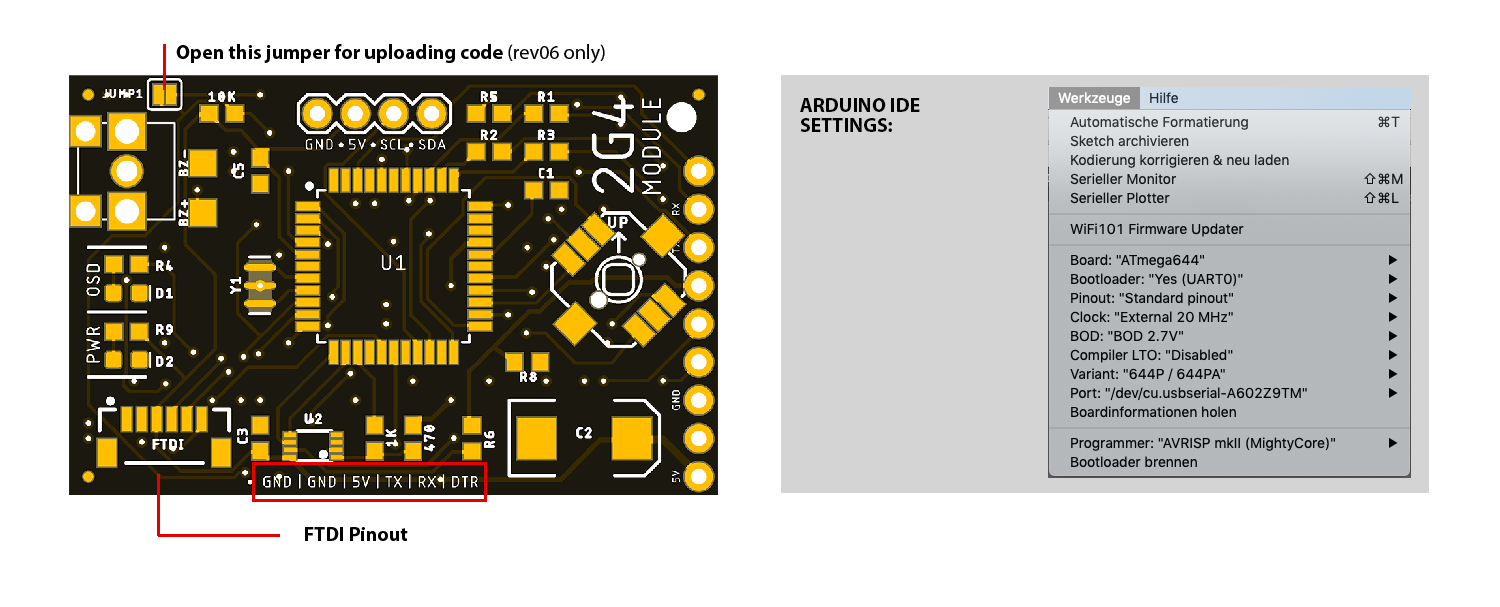
- You will need a FTDI to USB adapter to upload the module firmware. You may need to install the FTDI driver for it. Set the FTDI to 5V.
- Connect the FTDI tool according to the plug pinout as shown in the picture and select the COM port in Arduino IDE
- If you have the rev 06 PCB open the JUMP1 jumper on the PCB to upload code (solder it together after your upload is done).
- Select "AVRISP mkII"instead of "USBtinyISP" as a programmer, and select the right Port
- You can change the video format (PAL or NTSC) in the hardware.h file
- Upload the code
- You can now close the BUZZ (bottom side) and JUMP1 (top side) solder jumpers!