The following is a set of guidelines for contributing to the Tech Work Experience (TWE) Design System respository, hosted on GitHub. These are mostly guidelines, not rules. Use your best judgment, and feel free to propose changes to this document in the form of a pull request.
The guide below assumes that you have completed the onboarding process, including: joining the Hack for LA Slack, GitHub, and Google Drive; as well as having been matched with the TWE team. If you have not been onboarded, please refer to the Getting Started Page.
If you need a text editor to work on code, VS Code is recommended by the team, but feel free to use a text editor of your choice.
If you have any other questions about contributing, feel free to reach out to the team in the #internship Slack channel.
- How to Contribute
- Table of Contents
- Setting up the development environment
- How the Internship Team works with GitHub Issues
- Hack for LA Contributor Expectations
- Where can I find GitHub issues to work on?
- Claiming an Issue
- Create an issue
- Working on an issue
- Code Standards
- Pull Requests
- Additional Testing
- Resources and Documentation
In the #internship Slack channel, send an introductory message with your GitHub handle/username asking to be added to the Hack for LA website GitHub repository (this repository).
NOTE: Once you have accepted the GitHub invite (comes via email or in your GitHub notifications), please do the following: NOTE: Once you have accepted the GitHub invite (comes via email or in your GitHub notifications), please do the following:
- Make your own Hack for LA GitHub organization membership public by following this guide.
- Set up two-factor authentication on your account by following this guide.
Before cloning your forked repository to your local machine, you must have Git installed. You can find instructions for installing Git for your operating system here.
Please note that if you have a Mac the page offers several options (see other option, if you need to conserve hard drive space) including:
- an “easiest” option (this version is fine for use at hackforla): This option would take just over 4GB.
- a “more up to date” option (not required but optional if you want it): This option prompts you to go to install an 8GB package manager called Homebrew.
- Other option: If your computer is low on space, you can use this tutorial to install XCode Command Tools and a lighter version of Homebrew and then install Git using this command:
$ brew install gitwhich in total only uses 300MB.
Docker is the recommended approach to quickly getting started with local development. Docker helps create a local/offline version of the design system repo on your computer so you can test out your code before submitting a pull request.
The recommended installation method for your operating system can be found here. Feel free to reach out in the Hack for LA Slack channel if you have trouble installing docker on your system
More on using Docker and the concepts of containerization:
If you are on Windows and get 'You are not allowed to use Docker, you must be in the "docker-users" group' as an error message, the following wiki page is a guide for solving the issue: Windows docker-users group error guide.
If you are using Windows Subsystem for Linux (WSL) and finding a permission error when running docker-compose up, the issue might be caused by a version of Docker that relies on a buggy version of Go. In your terminal, run docker version to see which Go version is listed. Any version less than go1.20.0 has a problem and indicates that your Docker needs to be updated.
-
Forks: Personal copies of other repositories.
To fork this repository, click the "Fork" button at the top of the repository. Then, clone your fork in the desired directory on your machine with:
git clone https://github.com/{YOUR-GITHUB-HANDLE}/internship-website-design-system.gitAfter you've cloned your fork onto your local machine, it's important to check that the local repository is correctly linked to your fork on GitHub. This means verifying the
originURL points to your forked repository. Follow these steps to ensure your setup is correct:git remote -v
You should see
fetchandpushURLs with links to your forked repository under your account.To synchronize your local repository with the original project repository, it's essential to track changes made to the main project. Achieve this by adding an "upstream" remote, which points to the main project's repository. Execute the command below to add the upstream remote URL. Following that, update your local repository with the latest changes from the
hackforlaproject repository:git remote add upstream https://github.com/hackforla/internship-website-design-system git fetch upstream
Now, verify that your local repo contains both
originandupstreamremote URLs withgit remote -v. You should see:origin https://github.com/{YOUR-GITHUB-HANDLE}/internship-website-design-system.git (fetch) origin https://github.com/{YOUR-GITHUB-HANDLE}/internship-website-design-system.git (push) upstream https://github.com/hackforla/internship-website-design-system.git (fetch) upstream https://github.com/hackforla/internship-website-design-system.git (push)
IMPORTANT: Make sure Docker Desktop is running on your computer before executing the commands below.
-
cd internship-website-design-system -
docker compose up
This command will:
- Build the Docker image automatically
- Install all npm dependencies
- Compile Sass files initially
- Start the Sass watcher for live CSS compilation
- Start MkDocs server with live reload
- Set up file watching for automatic updates
-
Open your browser and navigate to: http://localhost:8000
Both Sass changes and documentation changes will automatically reload in your browser.
-
# Start in background (detached mode)
docker compose up -d

# Build fresh and start
docker compose up --build

# View logs while running in background
docker compose logs -f

# Check container status
docker compose ps
- If running in foreground: Press
Ctrl + Cin the terminal - If running in background: Run
docker compose down
- Edit Sass files in
docs/components/sass/ - Changes auto-compile and browser refreshes automatically
- Edit documentation in
docs/*.mdfiles - Changes auto-reload in the browser
- Live reload works for both CSS and documentation - no manual refresh needed
- File changes are instant - the container watches your local files
- Port 8000 serves the MkDocs site, port 35729 handles live reload
- If port 8000 is busy: Stop other services using that port or change the port mapping in
docker-compose.yml - Container commands: If you need to run commands inside the container:
# Access container shell
docker compose exec mkdocs sh

# Inside container you can run:
npm run dev          # Start only Sass watcher
npm run build-sass   # Build Sass once
npm run clean        # Clean compiled CSS
This section explains the standard process for building new components in the TWE Design System. Material 3 is used as a visual reference, while all tokens, styles, and implementation details are defined and maintained in this repository.
- Material 3 Design Kit (Figma) is used to understand:
- Review component structure
- Understand states, classes and other variants
- Variants and behavior
Link : https://www.figma.com/community/file/1035203688168086460/material-3-design-kit
- The Figma Material Theme Builder is used to:
- Preview themes and color systems
- Export reference values for inspection
Link : https://www.figma.com/community/plugin/1034969338659738588/material-theme-builder
- The exported JSON is used only as a reference and is not directly consumed by the codebase.
- All design tokens live in
docs/components/sass/abstracts/. - Tokens are defined in
tokens.scss. - Tokens represent component-level values, not raw design values.
- Tokens may reference existing values from
variables.scsswhere appropriate. - New components should define tokens instead of hardcoding values in component SCSS.
Example:
[data-theme="material"] {
  --checkbox-unchecked-outline-color: var(--color-outline);
  --checkbox-checked-fill-color: var(--color-primary);
}Tokens act as a semantic layer between raw design values (variables.scss)
and component implementation (components/*.scss).
They exist to answer the question: “What does this value mean in the UI?”, not “What is the value?”
Rules:
- Tokens describe intent (e.g.
--token-button-filled-bg) - Variables describe raw values (e.g.
--color-primary) - Components MUST consume tokens, never raw variables
Before creating a new token, always check whether an existing token already represents the value or concept you need. Tokens should represent design decisions, not one-off component styles.
- The value already exists and is semantically correct
- The same value is used (or likely to be used) across multiple components
- The token represents a shared concept (color, spacing, radius, state layer, etc.)
Example:
-
You need a hover overlay for a new component
→ Use--token-state-hover-layerinstead of creating--token-new-component-hover-bg -
You need rounded corners for a button-like component
→ Use--token-button-radiusif the visual intent matches
- The value represents a new design decision
- The value is component-specific and not reusable elsewhere
- Reusing an existing token would change the meaning of that token
Example:
-
A pagination component introduces a new “selected page” background that doesn’t match any existing surface or button state
→ Create a new pagination-specific token -
A component requires a spacing value that does not align with existing spacing tokens
→ Introduce a new token rather than hardcoding the value
If you’re unsure:
- Start by trying to reuse an existing token
- Only introduce a new token if reuse would be misleading or restrictive
-
abstracts
variables.scss
Global, low-level values (colors, spacing, typography).tokens.scss
Semantic, component-level design tokens.
-
components
- One SCSS file per component.
- Components consume tokens via CSS custom properties (CSS variables).
-
main.scss- Imports all component styles.
- Review the component in the Material 3 Figma design kit
- Identify component states, variants, and required tokens
- Define component tokens in
tokens.scss - Implement component styles using tokens
- Add or update the component documentation page (
docs/component.md) - Include HTML, CSS, and JS snippets demonstrating usage
Material is used as a design reference, while all implementation details, tokens, and styling decisions live within this repository.
In order to work on a Complexity: Small/Complexity: Medium/Complexity: Large label issue within this repo, it's recommended you complete the following:
- good first issue
- Self-assign an issue with the
good first issuelabel. - Complete steps in Working on an issue to create a solution for the issue
- Complete steps in How to make a pull request to get your solution reviewed by the website-merge team.
- Once your pull request is merged, you can work on your next issue.
- Self-assign an issue with the
- Repeat #1 with a new good first issue
Progress through issues with increasing complexity in the following order:
- Good first issue (x2)
- Small
- Medium
- Large
- Extra Large
The reasons for this progression are:
- The issues start out as being prescriptive and become less so as you gain more experience by working through increasingly complex issues.
- We are trying to teach you the team methodology through the issues themselves.
- It ensures you understand what we expect and the quality of contributions.
All TWE team members are required to attend at least 1 team meeting in a week (held on Wednesdays and Thursdays). In case, you are unable in any given week, you should reach out to the tech leadership team. Exceptions to this requirement may be provided on a case-by-case basis.
All TWE team members are expected to devote a minimum of 6 hours per week while working on various assignments during their entire tenure on the internship team (excluding week offs and vacations).
Also, please let the tech leadership team know (through a Slack message in the internship channel as well as an @ mention in a comment of the issue that you would be working on) if you are planning to take a week off or a longer vacation.
The best way to view the issues available is our GitHub Project Board
For the purpose of finding issues to work on, developers should focus exclusively on the Prioritized Backlog column, which contains all the available issues that have been approved and prioritized.
Note: The column is filtered so the first (top) issue has the highest priority and should be worked on next.
Use the link good first issues to display "good first issues" (for both front end and back end roles) in the Prioritized Backlog column.
Note: The column is filtered so the first (top) issue has the highest priority and should be worked on next.
Prioritized Backlogcolumn in the filtered Project Board - complexity: Small labelPrioritized Backlogcolumn in the filtered Project Board - complexity: Medium labelPrioritized Backlogcolumn in the filtered Project Board - complexity: Large and XLarge label
Once you find an issue you want to work on, you need to self-assign to claim it and then move the issue from the Prioritized Backlog to In progress. Both of these tasks can be accomplished within the issue. Please see the examples below. (Note: Any issue that you are working on besides the pre-work issue should remain in the In progress column and stay open. Once a tech lead merges your pull request associated with that issue, there is automation through GitHub Actions that will take care of moving the issue to a different column and closing the issue.)
Click here to see how you assign & unassign yourself to an issue
Assign/Unassign demo

- Go to the issue you want to work on
- Go to the right hand menu under
Assignees- Click the
assign yourselflink
- Click the
- Go to the issue you are assigned to
- Go to the right hand menu and click on the gear wheel (:gear:) to the right of
Assignees- Click on the
X clear assigneeslink
- Click on the
Click here to see how to move an issue from the ‘Prioritized Backlog’ to the ‘In progress (actively working)’ & back
Project Board column demo
- Click on the dropdown menu within the
Projectssection of the right-hand menu (value will showPrioritized Backlogif unclaimed)- Select
In progress (actively working)
- Select
- Click on the dropdown menu within the
Projectssection of the right-hand menu (value will showIn progress (actively working)if unclaimed)- Select
Prioritized Backlog
- Select
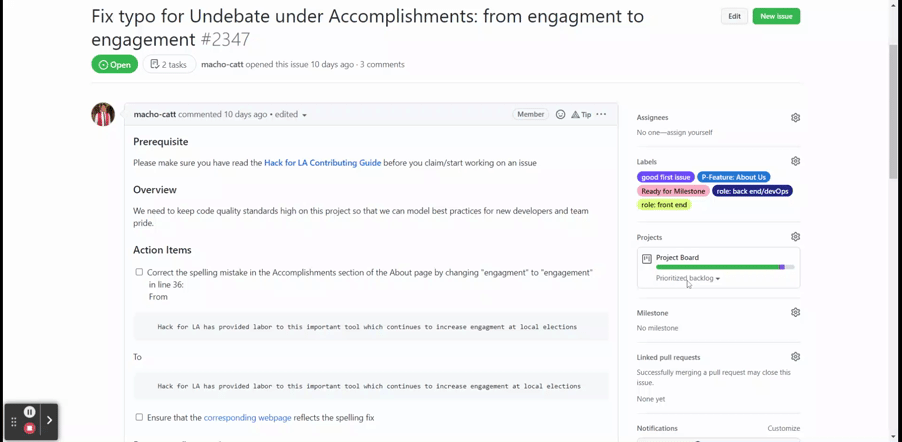
To create a new issue, please use the blank issue template (available when you click "New Issue"). If you want to create an issue for other projects to use, please create the issue in your own repository and send a Slack message to one of your hack night hosts with the link.
Create an issue using the template found here
The git branch command will let you know what branch you are in, and what branch names are already in use.
git branchYou will see a list of all of your branches. There will be a star (*) next to the branch that you are currently in. By default you should start on the main branch.
Note: When you work on future issues, you must always be in the main branch when creating a new branch.
If you are not currently in the main branch, run the following command to return to it:
git checkout mainUpdate your main branch with upstream changes:
git pull upstream mainIf you have not already done so, run git checkout main to switch the working directory to the main branch and then update main with upstream changes as described above.
Using the -b flag you can also use the git checkout command to create a new branch and immediately switch into it.
For example, if you create a new issue branch for Create Pagination:
git checkout -b paginationThe text after the -b, in the example pagination, will be the name of your new branch.
Note: Choose a branch name that:
- matches the name in your issue, if specified; OR
- relates to the issue (No spaces!)
Note: The format should look like the scheme above where the words are a brief description of the issue that will make sense at a glance to someone unfamiliar with the issue.
We urge developers to be cautious using git add. In general it is not advisable to use git add -all or git add .. Rather, run git status, examine the output carefully, and then add only those files specifically related to the current issue. This will ensure that no extraneous files are included in the subsequent commit.
When you've finished working on your issue, follow the steps below to prepare your changes to push to your repository.
Testing is a fundamental step to ensure quality of code and that code changes are functioning as expected. We don't want to debug or find solutions for features while the code is already in a production environment in real time. For some it's not the most engaging step and skip it, others simply have not done it before, and some may see it as unecessary time consuming step.
When testing, run your local microsite and view it in the browser. You will also want to open the main microsite in a new tab. Locate your changes on both sites and consider whether these changes address the issue. Some important questions to ask are:
- Are the changes applicable to the issue?
- Are there changes beyond those applicable to the issue?
- Does the microsite appear less user-friendly?
- Do the links and components on the page still work as intended?
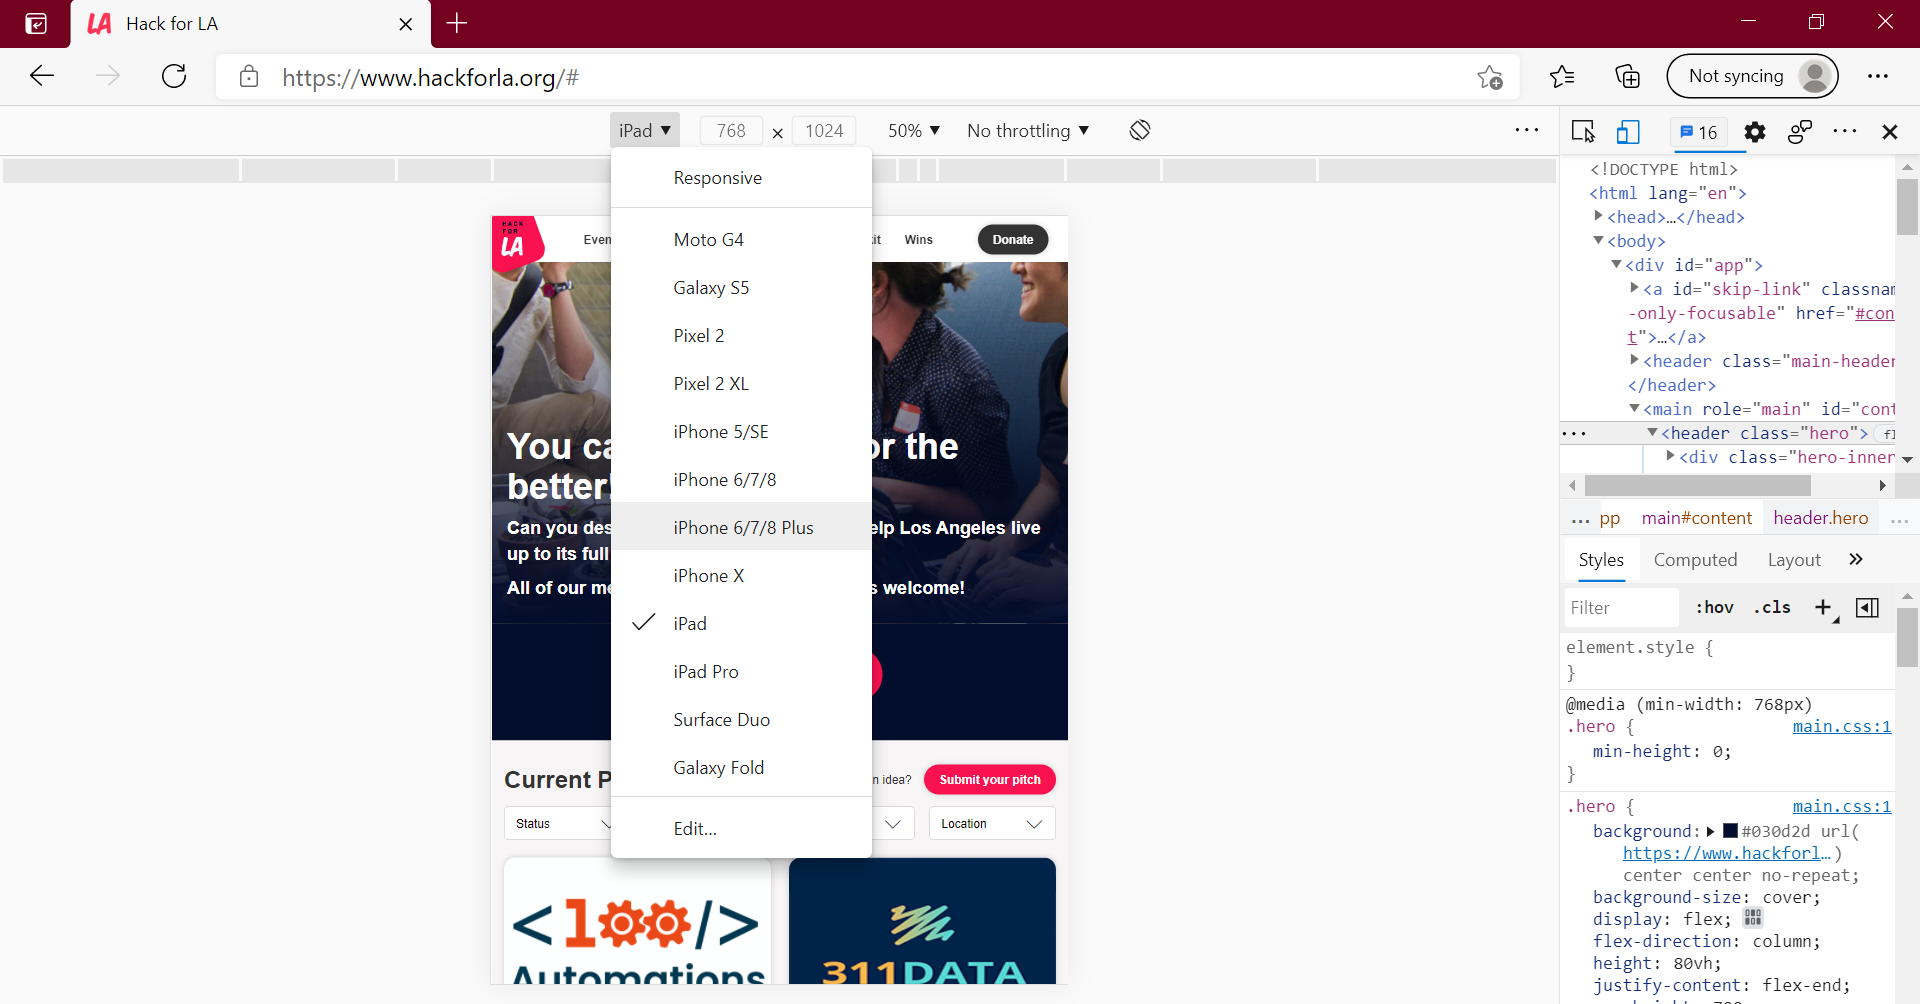
In addition to viewing changes on your desktop browser, you must also assess these changes in multiple viewports (such as mobile or tablet), through your browser's developer mode.
An example of developer mode in Microsoft Edge (90.0.818.51)
- Make sure to comment on your issue if you aren't sure how to test something, and then to put it in the Questions / In Review column and add the
ready for dev leadlabel. Paste a link to your comments in the #hfla-site Slack channel asking peers for help.
Once you are done with the work on your issue you will push it to your repository. Before you can push your work to your repository, you will stage and commit your changes. These two commands are similar to the save command that you have used to in other programs.
Note: If you are using Visual studios code you can use the Git graphical user interface to stage your changes. For instructions check out the Git Gui Wiki
This command prepares your changes before you commit them. You can stage files one at a time using the filename.
Run this command if you want to add changes from a specific file(s) to your commit record:
git add “filename.ext”This command will list the files that have been staged. These are the files that will be committed (saved) when you run the next command, git commit. Please be sure all your staged changes are relevant to the issue you are working on. If you accidentally included unrelated changes, please unstage them before making this commit, and then make a new commit for the unrelated changes. (The commands for unstaging commits are provided in the output of your git status command.)
git statusThis command will remove a file that has been staged. This file will not be committed (saved) when you run the next command, git commit. This only works if the wrong files were added, but they were not yet committed. The file will be removed from the staging area, but not actually deleted:
git reset HEAD “filename.ext”This command saves your work, and prepares it to push to your repository. Use the -m flag to quickly add a message to your commit. Your message should be a short description of the issue you are working. It will be extremely helpful if other people can understand your message, so try to resist the temptation to be overly cryptic.
To commit your changes with a message, run:
git commit -m “insert message here”IMPORTANT: Before you push your local commits to your repository, sync your fork to the main Hack For LA website repository. You can sync your fork directly on GitHub by clicking "Sync Fork" at the right of the screen and then clicking "Update Branch":
Click here to see how to sync the fork on GitHub
Next, bring upstream changes into your topic branch. With your topic branch checked out, run:
git pull upstream mainIf you do not see any output, there have not been any changes in the main repository since the last time you checked. So it is safe to push your local commits to your fork.
If you just type git push you will be prompted to create a new branch in your GitHub repository. The more complete command below will create a new branch on your copy of the website repository, and then push your local branch there. The name at the end of this command should be the same as the name of the local branch that you created back in step 3, as in the example below:
git push --set-upstream origin paginationWhen you check the upstream repository, you may see output like this:
Fetching upstream
remote: Enumerating objects: 11, done.
remote: Counting objects: 100% (11/11), done.
remote: Compressing objects: 100% (7/7), done.
remote: Total 11 (delta 5), reused 7 (delta 4), pack-reused 0
Unpacking objects: 100% (11/11), 8.25 KiB | 402.00 KiB/s, done.
From https://github.com/hackforla/internship-website-design-system/
+ 770d667...14f9f46 Zeven     -> hackforla/Zeven  (forced update)
* [new branch]      Zeven     -> hackforla/Zeven
5773ebe..0c86ecd    main      -> main
Note: You can safely ignore changes in other issue branches, such as Zeven above. But if you see changes in main, as in 5773ebe..0c86ecd main -> hackforla/main, you should incorporate those changes into your repository before merging or rebasing your issue branch. Use the instructions below to bring your fork up to date with the main repository.
Your fork of this repository on GitHub, and your local clone of that fork, will get out of sync with this (upstream) repository from time to time. (That's what has happened when you see something like "This branch is 1 commit behind hackforla:main" on the GitHub website version of your repository.)
One way to keep your fork up to date with this repository is to follow these instruction: Syncing your fork to the original repository via the browser
You can also update your fork via the local clone of your fork, using these instructions. Assuming you have a local clone with remotes upstream (this repo) and origin (your GitHub fork of this repo):
- First, you will need to create a local branch which tracks upstream/gh-pages. You will only need to do this once; you do not need to do this every time you want to incorporate upstream changes.
Run the following two commands:
git fetch upstream
git checkout -b upstream-main --track upstream/main
If you have already created the branch upstream-main, the following commands will incorporate upstream changes:
- Move to the branch you want to merge with.
git checkout upstream-main- Update your tracking branch with the latest changes from the
mainbranch in this repository
git pull - Move back to your main branch
git checkout main- Merge your changes back into your
mainbranch.
git merge upstream-mainIf you do all your work on topic branches (as suggested above) and keep gh-pages free of local modifications, this merge should apply cleanly.
Then push the merge changes to your GitHub fork:
git pushIf you go to your online GitHub repository this should remove the message "This branch is x commit behind hackforla:main".
To incorporate these updates from the main GitHub repository into your topic branch, you can 'rebase' your branch onto your updated gh-pages branch. NOTE you should only rebase if you have never pushed your topic branch to GitHub (or shared it with another collaborator).
git checkout pagination
git rebase main
If you receive warnings about conflicts, abort the rebase with git rebase --abort and instead merge gh-pages into your branch.
git checkout pagination
git merge mainOnce you are satisfied with your changes, push them to the feature branch you made within your remote repository.
git push --set-upstream origin paginationNote: We will use the pull request Pagination #19 as an example. This is tied to issue #753 Create Pagination.
Click here to see a notification for a pull request

Click here to see pull request markdown template
<!-- Important! Add the number of the issue you worked on -->
Fixes #replace_this_text_with_the_issue_number
### What changes did you make?
<!-- Note: add lines if needed, and remove any unused lines -->
-
-
-
### Why did you make the changes (we will use this info to test)?
<!-- Note: add lines if needed, and remove any unused lines -->
-
-
-
### Screenshots of Proposed Changes To The Website (if any, please do not include screenshots of code changes)
<!-- Notes:
- If there are no visual changes to the website, delete all of the script below and replace with "- No visual changes to the website"
- If there are visual changes to the website, include the 'before' and 'after' screenshots below.
- If your images are too big, use the <img src="" width="" length="" /> syntax instead of  to format the images
- If images are not loading properly, you might need to double check the syntax or add a newline after the closing </summary> tag
-->
<details>
<summary>Visuals before changes are applied</summary>

</details>
<details>
<summary>Visuals after changes are applied</summary>

</details>
- When the pull request is opened, the cursor will be located in the title input box, and the default title will be your last commit message from your branch.
- Change the title to a short summary of what you did on the issue:
-
Advice: Provide a 4-12 word description of your resolution to the issue
-
Unlike our example, this would be an ideal version:
Created Pagination component page -
Note: Upon creation, the pull request number will be appended to the title automatically. To avoid confusion, please do not include the issue number like our example in the title.
-
We have a GitHub action that automatically closes all issues connected to a pull request. So for our example we need to make the following changes:
From
Fixes #replace_this_text_with_the_issue_number
To
Fixes #753
Note: This will now connect the issue and pull request both close when the pull request is successfully merged.
In bullet point form, explain the changes you made in order to complete the action items within your issue and why. @zvidmarb provided the following summary in PR Pagination #19:
What changes did you make?
- Implemented a pagination component with functional nav buttons that iterate between active pages
- Page and Control buttons are complete with proper sizing, positioning, and states matching design system
- Added a proper documentation page demonstrating component and presenting HTML, CSS, JS code
- Diverged from design system slightly with opacity values, added variables to more closely match design system color names
- Removed inline style tag hack (pagination.scss) for working around ongoing live-reload issues

Why did you make the changes (we will use this info to test)?
- Pagination was unimplemented; added all functionality possible with current scope
- Page, Control, and More buttons within pagination component have overlapping states, so Control and More are variants of a primary page button styling
- Ready for Dev design page (Resource 1.01) is slightly outdated, kept microsite page consistent with other pages
- Opacities were requiring too much variety to variables... see Buttons #10 for an alternate implementation with similar opacity values as variables?
Note: All the bullet points addressed the action items within that issue.
In the example above, changes are shown by adding images within the <details>/<summary> tags like so:
Screenshots of Proposed Changes Of The Website (if any, please do not include screenshots of code changes)
<!-- Notes:
- If there are no visual changes to the website, delete all of the script below and replace with "- No visual changes to the website"
- If there are visual changes to the website, include the 'before' and 'after' screenshots below.
- If your images are too big, use the <img src="" width="" length="" /> syntax instead of  to format the images
- If images are not loading properly, you might need to double check the syntax or add a newline after the closing </summary> tag
-->
<details>
<summary>Visuals before changes are applied</summary>
</details>
<details>
<summary>Visuals after changes are applied</summary>
</details>
Note: Not all pull requests will make visual changes to our website. Please do not include screenshots from VSCode / other IDE. If your pull request does not make visual changes to our website, please remove the entire <details>/<summary> section and replace it with a brief summary stating that there are no visual changes, for example:
### Screenshots of Proposed Changes Of The Website  (if any, please do not screen shot code changes)

Moving files to another directory. No visual changes to the website.
NOTE: There is an automation for adding newly created pull requests to the Project Board. However, it still should be manually checked to make sure the pull request has been placed on the Project Board in case automation breaks.
After you have submitted your pull request, add it to the project board by clicking the gear icon on the right under Projects and selecting 'Project Board.'

NOTE: After completing your assignment and committing all of the changes, you must leave your current branch and return to the main branch.
Run the following command to return to the main branch:
git checkout main
Once your pull request is merged you can delete your branch with the following command:
git branch -d pagination
Now you are all set to work on a new PR. Start over at Where can I find GitHub issues to work on? and repeat completing parts 2 and 3.
If you find an error in your code or your reviewer asks you to make a change, please avoid editing your code directly from the pull request. Instead update it in your local branch first and then push it to your origin remote. This will update the original pull request.
Merge conflicts occur when two or more branches of code have been modified in conflicting ways, making it difficult for the version control system to automatically merge the changes together. This often happens when two developers modify the same line of code, when one developer deletes a file that another has modified, or when one developer renames a file while another is still working on it.
Resolving merge conflicts typically involves reviewing the changes made in each branch, deciding which changes to keep, and manually editing the code to resolve the conflict.
Please check out this documentation from VSCode for more information on handling merge conflicts.
For help on testing with your issues, see Testing your Code Changes.
We also have a number of automated testing actions that apply when pull requesting and pushing changes. As of Jan 2026, these actions are temporarily disabled. Below is the previous documentation for future reference.
Before any code is committed, an automated Pa11y accessibility test runs via a pre-commit hook. This helps us maintain a high level of accessibility across the entire project. The test results are saved in a CSV file located in the /output folder at the root of the repository.
To view the Pa11y test results, you can easily open the CSV file within your IDE. We recommend using the Excel Viewer by GrapeCity for a smooth experience. Excel Viewer also supports organizing and filtering the values within the CSV file, making it easy to filter by accessibility error or see errors for a specific microsite page.
-
Install the Extension:
- Search for "Excel Viewer" by GrapeCity in your IDE’s extension marketplace and install it.
-
Open the CSV File:
- Navigate to the
/outputfolder in the root of the repository. - Right-click on the
pa11y-results.csvfile. - Click
Open With. - Select
CSV Editor.
- Navigate to the
We use Husky to enforce a pre-commit hook that runs the Pa11y accessibility test. In certain situations, you might want to bypass these hooks (like when working on something not directly related to the pages of the microsite). You can do this by:
-
Example:
HUSKY=0 git commit -m 'message' -
Example:
git commit -m 'message' -n
In addition to the automated pre-commit accessibility check, you can run the Pa11y accessibility test manually at any time. This is useful if you want to monitor accessibility errors as you work.
To run the Pa11y accessibility check manually, use the following command:
npm run pa11yThis will output the results in the same pa11y-results.csv file located in the /output folder. Note that this file will be overwritten the next time the pre-commit hook runs when you commit and push changes.
The best way to ask for help and provide as much information to the team is to do the following:
Click here for visual comment example

Click here to see how to copy a link that goes to an issue comment

- Click on the ellipsis (...) at the top right of the comment box
- Click on
Copy Link - Now paste that link in the
hfla-siteSlack channel - The Website Leadership/Merge Team will do its best to help resolve any blockers and provide guidance.
- Hack for LA Website Contribution file
- Wiki Resources
- Design References
- Tools and Extensions